
Actionable infolets were an amazing addition to CX Sales when they were introduced. They changed the way the homepage is being used from a useless homepage that allowed to navigate within the application to a homepage that helps us not to have to navigate anymore. Actionable infolets allow us to perform a lot of our day-to-day work from the homepage, without having to navigate around.
But infolets were limited to accounts, opportunities, leads, appointments, and tasks … until now! We now have additional actionable infolets that can be configured to enable any kind of access to the information you need
These are not based on an object though. Admins can group a number of saved Workspace searches, and make them available as an actionable infolet, even if these saved searches are surfacing search results from different objects.
The first one I made was of course on service requests. Let me show you what I had to do.

Configuring Additional Actionable Infolets
Configuring a new additional actionable infolet is really easy. It is a 4 step process:
- It all starts, as an admin in a sandbox, by adding one to the infolet page so that the configuration menu is available.
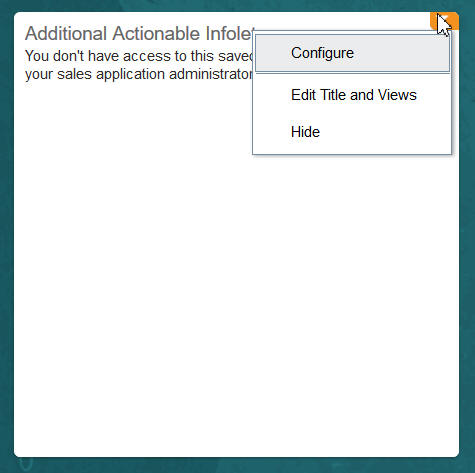
- Change the title to whatever you want it to be

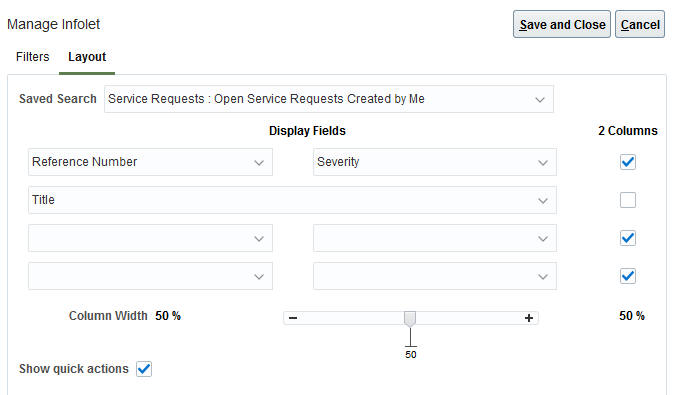
- Under Configure, select the Workspace saves searches that you want to enable as filters on the additional actionable infolet

- For each of the selected saved searches, specify the way the search results need to be visualized
Have fun and let me know how you will use these additional actionable infolets!


